

Following on from our Sewing Buttonholes : Tips n Tricks! post, today I bring you our Top 10 tips to stop you getting hot under the collar, curtousy of my lovely sewing friend, Suzy aka Suzy aka @sewing_in_spain. Over to you Suzy!
A quick online search will bring up many styles of collar, but here we’re going to look at the classic shirt collar; it’s made of two parts, the collar and the collar stand.
On Your Marks!
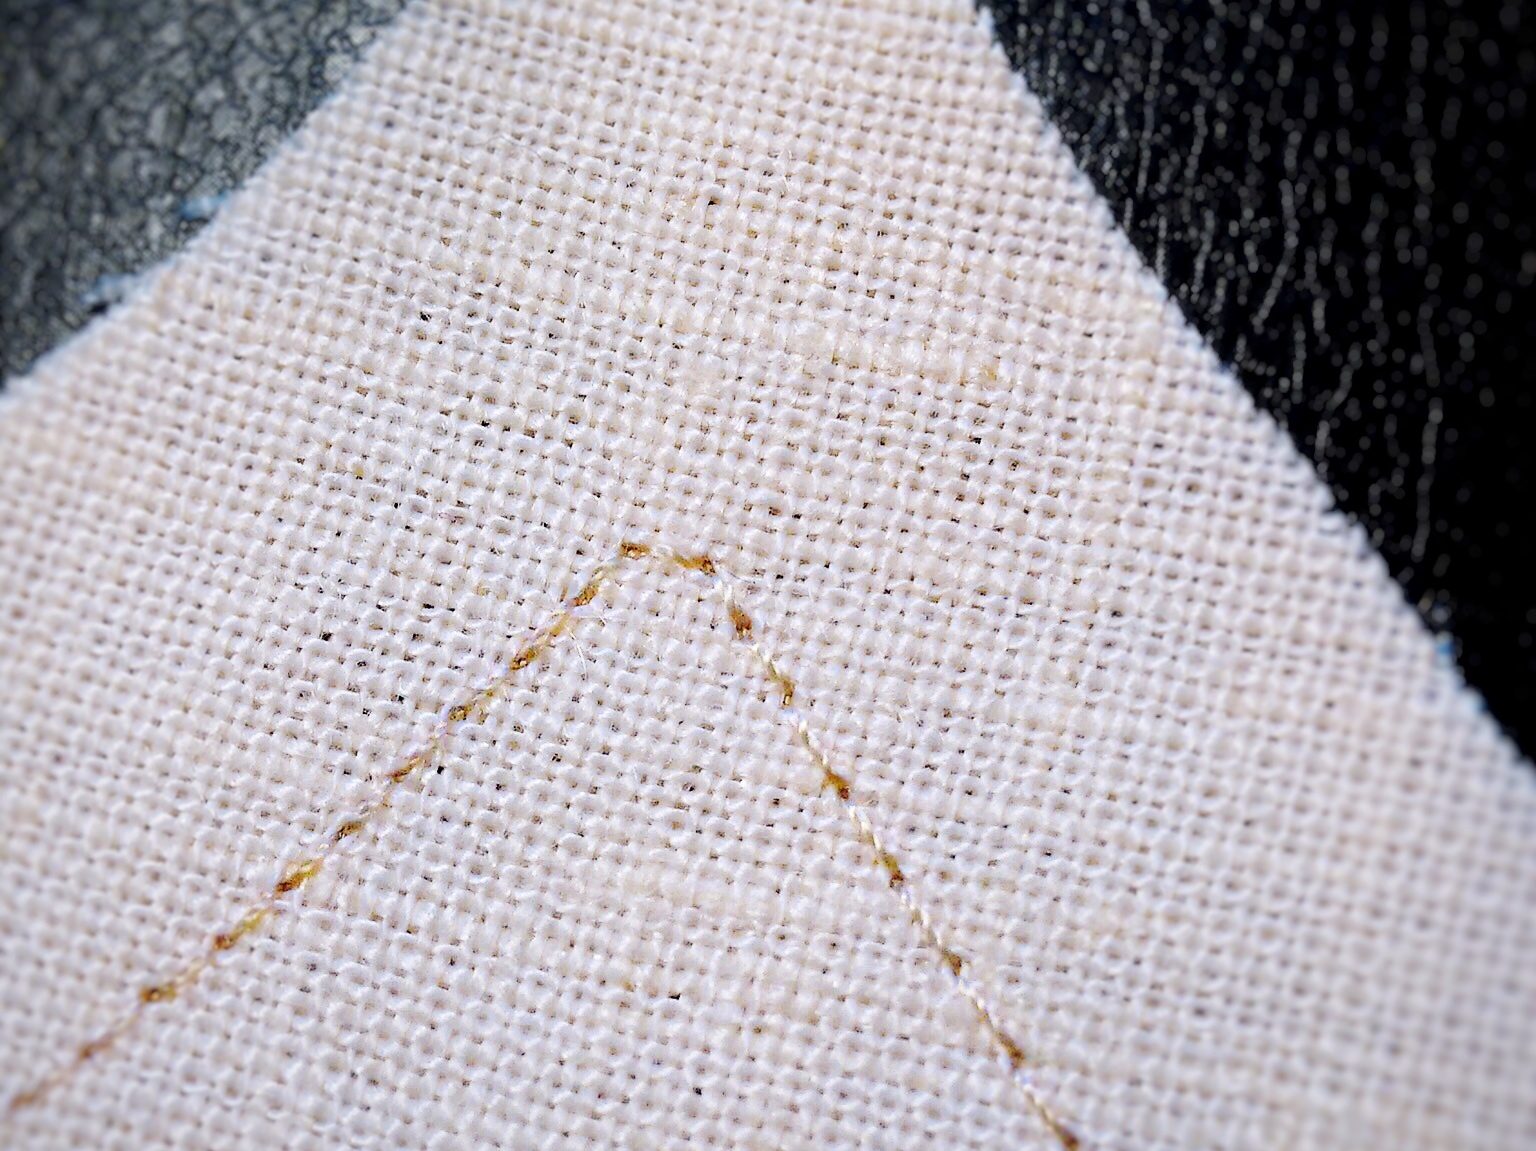
The most important part of successful collar making comes before we start sewing. Cut very precisely and double-check that your collar pieces match the pattern. Then transfer all the pattern markings on your pattern pieces. There are many ways of marking, but for collars I prefer old-fashioned tailor tacks and thread tracing as they don’t rub or iron off. Here I have thread traced the centre-front and centre-back with silk thread.

Biased Approach
Still on cutting out – cut the undercollar on the bias, this helps the collar to roll gently under. You can draw a bias line on your pattern piece: just draw a square using the original grainline as one side and draw a diagonal line between two opposite corners.
Go With the Right Shape Collar for You!
Think about your collar size and shape preference before you start; different collar shapes suit different face shapes. I often find collars of the big four pattern companies a bit large for my round face and short neck – I have finished a shirt, just to find I don’t like the shape or size of the collar. So before you start cutting, get hold of the pattern piece of a collar which you know you like – here I have a Grainline Studios Alder collar – and put it on top of your collar piece, here McCall’s 6696…you can see how much bigger the lower one is.

I would suggest tracing your collar and placing the other on top, then you can trim or reshape the pattern piece. Don’t touch the bottom seam which fits into the collar stand.
Alternatively, you can compare it to a RTW collar you like, but remember to add seam allowances. You could trim off the corners to give a rounded shape if you prefer; in this case, plenty of notches before turning out will give you a nice curve.
A Quick Trim
Once you have cut out your collars, take the under collar and trim off a sliver of fabric, 2mm (just under 1/8th inch), from the sides and the top, but tapering to nothing at collar points. Trim the same amount from the curved edges of the inner collar stand. This also helps the collar to roll the right way.

My fabric frayed easily so my trimmings are a bit untidy, but if you are using a cotton it’ll be much easier.
Interfacing!
Interfacing is vital and will influence the look of your collar, so it’s worth considering what type you need before you start sewing.
- For a soft collar look, use a cotton batiste instead, or a very light interfacing, or simply interface the under collar.
- For a medium look interface the upper collar with interfacing of similar weight to the fabric
- For a very crisp collar interface both the upper and lower collar pieces, or use several layers of organza.
Cut the interfacing to sit just within the seam allowance, so that it does not add bulk to the seams.
Flash Point!
Sew the two collar pieces right sides together, start stitching at the centre back mark of your collar, and make your stitches smaller as you get nearer the point. At the point, don’t pivot, but sew one or two small stitches on the corner, strangely enough this gives you a better point than a pivot.
Then turn the collar over and do the same for the other side from the centre back. Sewing from the middle will give you a more even collar.
Now trim and turn as usual. There is a wonderful couture way to turn the perfect points collar out using a thread sewn into the collar temporarily – you can find out more from Off the Cuffs blog post.

Normally your pattern will tell you to make your collar and then attach the collar to the collar stand. The completed two piece collar is then attached to the neck of your shirt. I don´t know about you, but I have a heck of a job attaching the straight-ish and stiff constructed collar into a more wobbly and curved edge, and get the collar stand lined up. So this is the method I use nowadays, which gives me much better results.
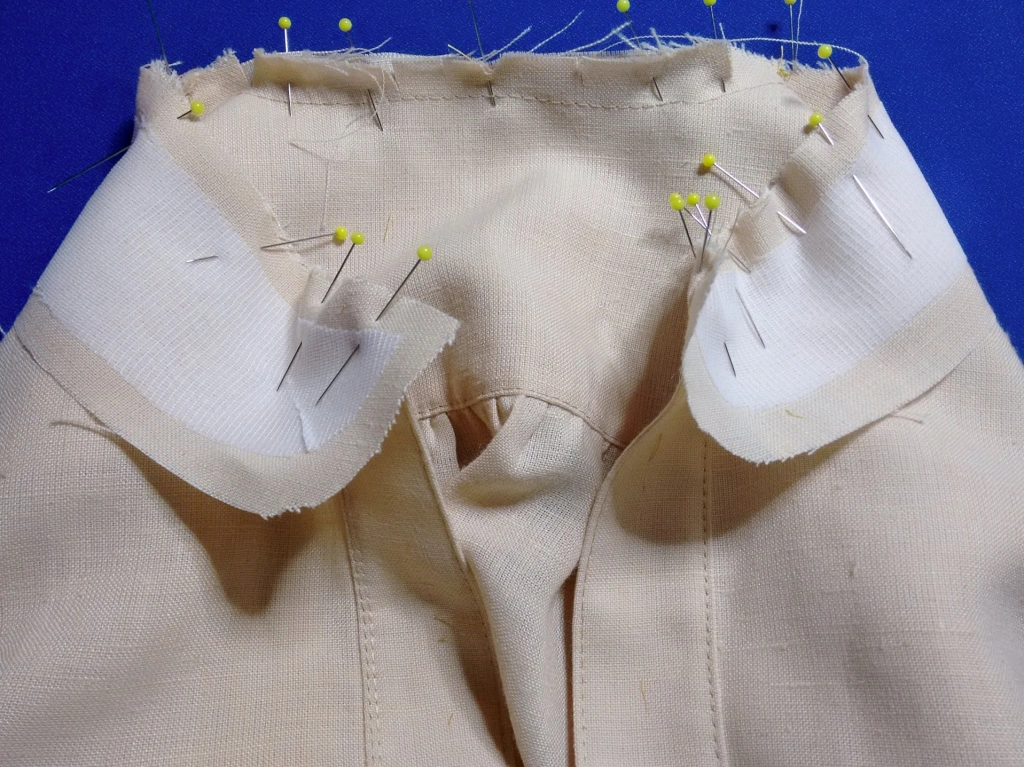
First of all, stay-stitch your neckline and cut snips inside the stay-stitching. Attach your interfaced outer collar stand to the neckline, start pinning at the centre back, matching all notches. The collar stand will extend 1.5cm, or whatever your seam allowance is, from the button band on each side. Stitch.

Then attach your prepared collar to the collar stand, matching notches and the centre-back markings (again I start pinning from the centre-back). See how valuable that centre-front thread tracing is now? Baste.
Now you just need to attach the other collar stand, sandwiching the collar in between the two stands, and stitch. Trim and turn out. Hooray! You can slipstitch the collar stand to the inner neckline, but I usually grade the seams, turn it out, press well, tack it in place and topstitch the collar stand, starting at the centre back once again.

Make a Template!
I find it really helpful to make a template of the curved end of the collar band minus the seam allowances. I then keep it in with my pattern.

You can draw around it to make sure both sides of your collar band follow the same curve, and you can insert it inside to press the collar band before sewing down.
Add a Little Extra
It’s easy to attach a ribbon to your inner collar stand to make your shirt more special but it also gives the collar stand more stability and is used in men’s shirts to reduce wear.
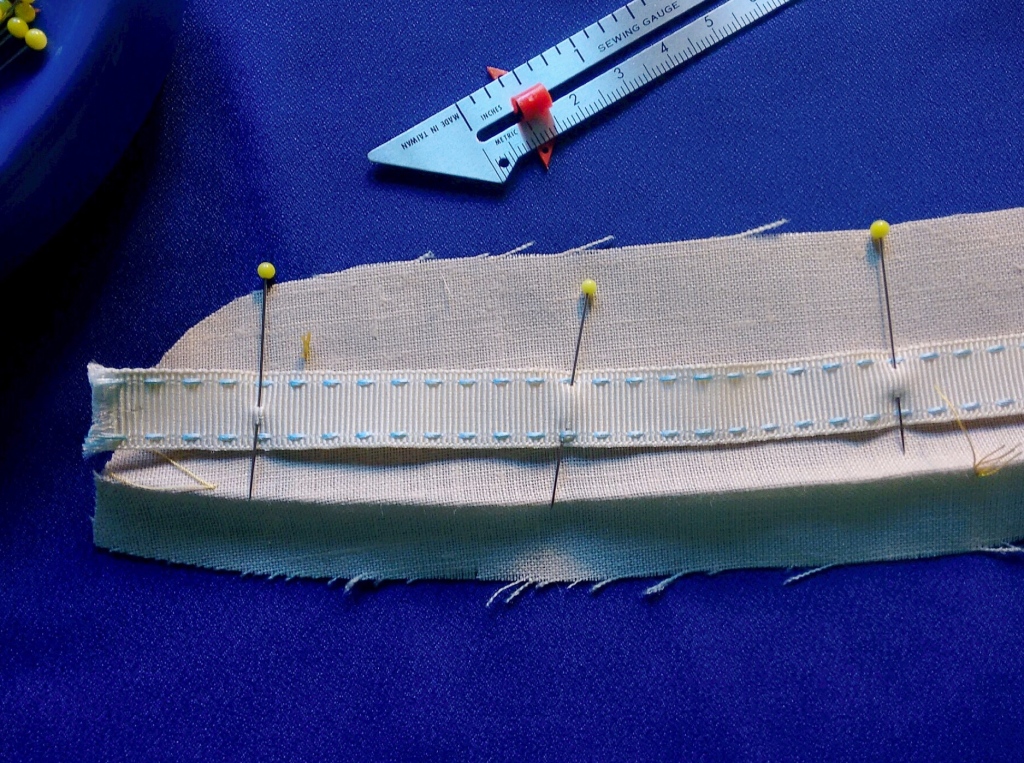
You’ll need a piece of ribbon 4cm longer than your collar stand. Pin and tack it in place on the inner collar stand.
Then edge stitch both sides of the ribbon. Trim off the excess ribbon.


Then make up your collar as normal and the ribbon will be inside your collar.

If All Else Fails…Simplify!
If you don’t like collars, or you or find it too time consuming, then you could just sew the collar stand and leave the collar off, to create a kind of Mandarin collar or granddad collar.

Attach the inner collar stand and then the outer stand as before.
You should now have a perfectly sewn collar. Congratulations!
Until next time, happy sewing!

LIKED THIS POST? Subscribe!
Other posts you may like :


Loading…
Something went wrong. Please refresh the page and/or try again.

[…] body of the garment. I find this really fiddly and annoying and much prefer the method explained by Suzy on Sew Sarah Smith’s blog. This involves attaching the under collar to the garment, then the top collar to the under collar […]
LikeLike
Ah, you can still add that shot of whiskey John! Thank you very much for the heads up; really appreciated!
LikeLiked by 1 person
whew, thought I was gonna have to add a shot of whiskey to my coffee..thanks Sarah…GREAT tutorial, I’m going to go try it right this minute
LikeLiked by 1 person
Oops…typo…definitely sew right sides together! 👍🏻 (I’ve amended the blog post!)
LikeLiked by 1 person
Flash Point!
Sew the two collar pieces wrong sides together,… Really?
LikeLike
Wow Joan, that’s fantastic to hear, thank you so much! X
LikeLike
Your Sewing Collars – 10 tips and tricks tutorial is hands-down the BEST lesson I’ve ever had on collar attaching — and I’ve been sewing for 60 years! It’s FABULOUS and so easy!! Thanks so much!!
LikeLiked by 2 people
Hi and thank you. I know what you mean. The only real tip I have is to draw the stitching line / curve in carefully first; and to resew that area if need be until everything butts up correctly. xx
LikeLike
Hello – a bit late to the party here but thanks for the great tips which will definitely take my collars up a notch 😊
But the one area I struggle with getting really neat is where the collar stand joins the shirt at the front edge(s). I often end up with a bit of hand stitching to tidy it up 🤭. Do you have any hints or tips to improve that. Same story joining cuffs to sleeves – but not as obvious there!
Thank you
Jill
LikeLiked by 1 person
[…] are also some great tips in this post on Sarah’s blog – I saw this post after I’d already sewn the collar or I definitely would have used […]
LikeLike
[…] sewn a fair few collars in my time (and, indeed, I’ve a whole blog post dedicated to them here) so it poses no problems. But just to clarify, as again Deer & Does’ instructions are pared […]
LikeLike
Rosemary I’m not 100% sure I understand your question…do you mean you’re looking to bind your neckline, I.e, to make a bias binding for it? You can either flip these to the inside or sew them to show on the outside, as you would on any stained tshirt. The same principle would apply for a woven top…You would measure the circumference of your neckline, add on an appropriate seam allowance and cut a strip of bias binding that length. Hope that helps!! Sarah x
LikeLike
can someone please tell me if it is possible to make a neck binding for a round neckline in non-stretch fabric? I have some scrapy polyester satin (enough to make a T shirt style top) and I want to add a contrast neck band but don’t know how or even if it is possible. All I can find on the web relate to stretch fabrics, neck facings or bindings. I would love some advice
LikeLike
[…] for the collar, I completely ignored the instructions altogether. I will only ever sew collars on according to this method. Again, it worked a […]
LikeLike
[…] the instructions was in attaching the collar and collar stand; I now use the method detailed on Sew Sarah Smith’s blog as standard and I’m much happier with the results I get with it. You basically attach one […]
LikeLike
Oh I’m so glad the collar Post helped. Well done!!!! Xx
LikeLike
[…] stand three times using less than accurate methods to make it larger. I also ended up using the Sew Sarah Smith blog post to attach the collar second time round and it worked out pretty well. There is some puckering […]
LikeLike
[…] Need to brush up on your collar making skills? We have a Collar post too! […]
LikeLike
[…] couple of belt loops, as before. As for the collar, I incorporated everything relevant from the Sewing Collars : 10 Tips ‘n’ Tricks! post, namely trimming the inner stand a smidge, interfacing the outer stand only within the seam lines […]
LikeLike
[…] The collar and collar stand are not difficult to construct although I am keen to try other methods and I’ll certainly topstitch at least the collar stand next time. If collars bother you, we do have a specific collar post HERE. […]
LikeLike
[…] my collar on a post came up on facebook about tips on stitching collars..perfect timing!” Sew Sarah Smith posted ten tips for sewing perfect collars, some I was too late for as I’d already cut my […]
LikeLiked by 1 person
Thanks so much Sonja! I love the look of the ribbon too – makes it seem more ‘high end’ somehow! Xx
LikeLike
That’s great Lynsey, thank you! 😊Here’s to some great shirts both our futures eh! 😘
LikeLike
Some super shirt skills, I’ve learnt lots 🤗 Thank you.
LikeLiked by 1 person
Great post with many useful tips and tricks. The idea of the ribbon on the inside is great and the stitching matches the buttons. I’ve seen this type of finishing on the inside of my husband RTW dress shirt and never thought it was for more stability.
LikeLike
Yey! Let’s rock The Collar!! X
LikeLiked by 1 person
Definitely going to come in useful when I go for my shirt dress. :=
LikeLiked by 1 person
Thanks Kathleen! I always love reading your comments!! Xx
LikeLike
I’m bookmarking this blog post! I love the idea of a ribbon on the inside of the collar stand (never seen that before or even noticed it inside my husband’s shirts) – one thing I always do is staystitch all around the inside collar stand because one time after cutting it out (on the bias as you recommend here too) it stretched unbelievably out of shape! Thank you for taking the time to write this post!
LikeLiked by 1 person
Thanks Wis! 😘
LikeLike
These are super tips! Very useful! Thanks Sarah and Suzy for sharing!
LikeLiked by 1 person